Choosing best value windows is not simply a matter of finding the lowest price. It means balancing energy performance, durability, installation quality, maintenance, and expected service life. A cheap window can become expensive when air leaks, condensation, or difficult operation appear after one winter.
The U.S. Department of Energy reports that windows may account for 25–30% of residential heating and cooling energy use. ENERGY STAR guidance also emphasizes U-factor, solar heat gain coefficient, and proper installation. These ratings matter, but they do not tell the whole story. The National Fenestration Rating Council’s certified product data can help homeowners compare tested performance before buying. The 2024 Cost vs. Value Report also shows that replacement windows may recover only part of their project cost, so resale value should not be treated as guaranteed profit.
Joe Lstiburek, Ph.D., founder of Building Science Corporation, offers a useful warning: “Windows are holes in walls.” That simple sentence changes the buying conversation. A high-rated window still performs poorly when the flashing is wrong or the frame is poorly sealed. This guide examines seven practical ways to identify best value windows, from comparing whole-window ratings to checking installer experience. There is no universal winner. Climate, wall design, sunlight, noise, and budget all change the answer. I would also question impressive laboratory numbers when local installers cannot explain them clearly. Value lives in the details.

Best value is not the lowest window price. It is the strongest match between performance, climate, budget, and expected service life. The U.S. Department of Energy estimates that windows can account for 25% to 30% of residential heating and cooling energy use. That makes “value” more than a purchase price. Define the target before comparing quotes.
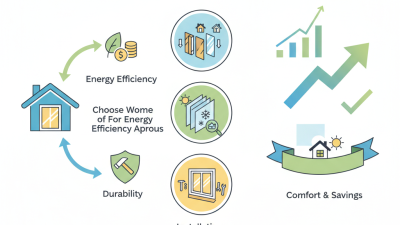
Use seven practical tests: climate, U-factor, solar heat gain coefficient, air leakage, visible transmittance, durability, and installation quality. Lower U-factor values generally indicate better insulation. In hot, sunny regions, a lower solar heat gain coefficient can reduce indoor heat.
The National Fenestration Rating Council provides standardized labels for comparing these measurements. Numbers need context. A highly insulated window may perform poorly if it admits excessive air or is installed carelessly.
Then calculate the full cost. Include removal, trim repairs, labor, maintenance, and possible energy savings. DOE guidance recommends considering orientation, shading, and local climate when selecting windows.
A common mistake is assuming premium glass always creates the best return. It may not. A modest product with skilled installation can outperform an expensive product with poor sealing. Weather, room use, and contractor methods can also disrupt careful estimates. Write down your priorities, request itemized quotes, and challenge any claim that lacks measurable ratings or a clear warranty.
Tip 1: Compare materials by climate, maintenance, and installation quality. Vinyl frames usually reduce upkeep and offer good insulation. Fiberglass resists warping and feels sturdy. Wood adds warmth but needs regular sealing. I once chose a beautiful frame without checking drainage details. That mistake created avoidable maintenance work.
Tip 2: Match the window style to ventilation and room use. Casement windows can create a tight seal and catch side breezes. Double-hung windows are practical for bedrooms and easier cleaning. Sliding windows need less clearance, but their seals may wear sooner. Open each sample if possible. Small hardware differences matter.
Tip 3: Read energy labels instead of trusting vague claims. Check U-factor for heat transfer, and review solar heat gain for sunny rooms. Lower U-factor often improves insulation, while suitable solar gain depends on local weather. Look for tested air-leakage data and certified performance ratings. Energy glass can help, but installation gaps can cancel much of its value.
Measure the rough opening twice. Then verify the wall condition. A skilled installer should explain flashing, shims, drainage, and final sealing. I learned that the cheapest quote was not the best value after labor was added. Still, expensive materials are not automatically wiser. Compare the complete cost, expected lifespan, cleaning effort, and comfort near the glass. Ask for written specifications, not promises.
Compare total costs, not just the invoice. The U.S. Department of Energy reports that windows can cause 25–30% of residential heating and cooling energy use. Begin with the installed price, including removal, sealing, trim, disposal, and labor. A lower quote may hide extra work. Ask for every charge in writing. Then compare U-factor and solar heat gain coefficient ratings. Lower U-factor usually improves insulation, while SHGC should match your climate and window exposure.
Check air leakage, glass configuration, frame durability, and expected maintenance. The National Fenestration Rating Council explains that standardized ratings support fair product comparisons. Request annual energy estimates from a qualified energy assessor, rather than trusting broad savings claims. Add likely repairs, repainting, hardware replacement, and cleaning over the window’s service life. Small costs accumulate. A detailed spreadsheet helps. It also exposes optimistic assumptions.
Review the warranty carefully. Confirm coverage for glass failure, installation defects, labor, and transfer to a future owner. DOE building research emphasizes that installation quality strongly affects envelope performance. Even an efficient window can underperform when gaps remain around the frame. Consider orientation, indoor comfort, condensation risk, and local weather. I once focused too heavily on the purchase price. That was a mistake. Payback is useful, but comfort, durability, and future repair risk deserve equal attention. Keep some budget for unexpected wall damage.
Request evidence of experience, not vague promises. Ask for project photos, references, insurance, and local licensing where required. A careful crew protects flooring, checks drainage paths, and tests each sash before leaving. Small gaps around a frame can create cold drafts beside a sofa. I would also compare the warranty line by line. Verify coverage for glass, hardware, seal failure, labor, transferability, and exclusions. Long coverage means little if labor ends after one year.
Maintenance should fit your real routine. Look for accessible tracks, replaceable weatherstripping, durable finishes, and clear cleaning instructions. The National Fenestration Rating Council explains that performance ratings help compare U-factor, solar heat gain, and air leakage. Use those figures alongside climate needs, not alone. A highly rated window installed badly remains a poor investment. I have seen homeowners focus on glass coatings while ignoring flashing and drainage. That mistake is easy to repeat. Reserve part of the budget for inspection and future hardware repairs.
7 Tips to Find the Best Value Windows
Choose a Reliable Supplier Using Reviews and Credentials
A low window quote can hide weak installation, unclear warranties, or poor after-sales support. Compare suppliers by checking trade credentials, insurance, training records, and relevant safety certifications. Ask who will install the windows. Some companies subcontract the work, which is not automatically bad, but the arrangement should be clear. Request a written quote showing frame materials, glass type, energy ratings, hardware, delivery, and installation costs. Clear details matter.
Look beyond stars. Read recent reviews across several independent platforms, especially comments about leaking frames, delayed repairs, and communication. Contact two or three past customers if the supplier can provide references. Ask whether the windows arrived undamaged and whether problems were resolved promptly. A showroom visit can reveal practical details, such as smooth hinges, firm seals, and secure locks. Touch the samples.
I once trusted a polished sales presentation too quickly. The quote seemed excellent, but it excluded interior finishing. That mistake changed how I compare suppliers. Now, I ask for the full installation scope and warranty terms before paying a deposit. Check how claims are handled, how long parts remain available, and whether maintenance instructions are supplied. A reliable supplier welcomes specific questions instead of rushing your decision. Still, reviews are not perfect evidence; unusual delays can distort ratings, so judge patterns rather than one angry comment.
Use this practical verification checklist when comparing suppliers. The evidence points represent the key documents, ratings, and service details worth checking before purchase.
Prioritize suppliers that can provide independent product performance ratings, valid credentials, clear pricing, installation references, and written warranty terms. Compare the same evidence across multiple quotations rather than choosing on price alone.